
Supplier Connector Overview
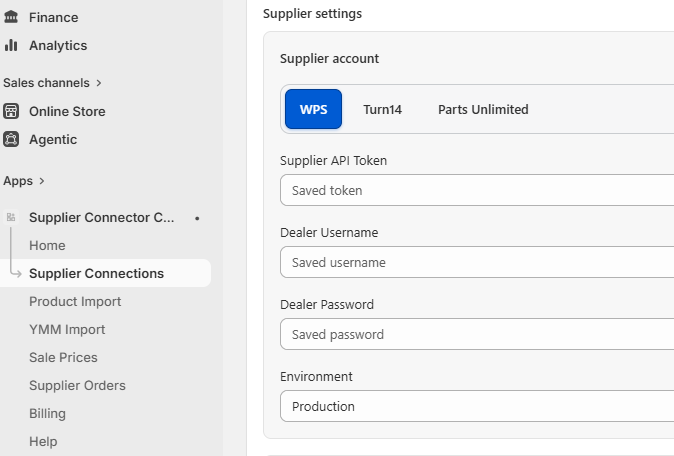
The Shopify Supplier Connector supports WPS, Turn 14 Distribution, and Parts Unlimited in one app. Each supplier has separate settings, single-product and bulk-import tabs, while shared catalog safeguards keep supplier data and Shopify mappings consistent.
- Import one SKU, a controlled supplier selection, or products that fit a selected Year, Make, and Model.
- Store supplier and manufacturer part numbers for reliable future matching.
- Update inventory and pricing without copying vehicle fitment into Shopify metafields.
- WPS and Turn 14 include their supported supplier-order workflows. Parts Unlimited orders must currently be submitted manually.
Choose the Right Product Import
- Single Product Import: add or update one known supplier SKU.
- Bulk Product Import: browse or filter supplier inventory, review the result count, and queue a controlled import.
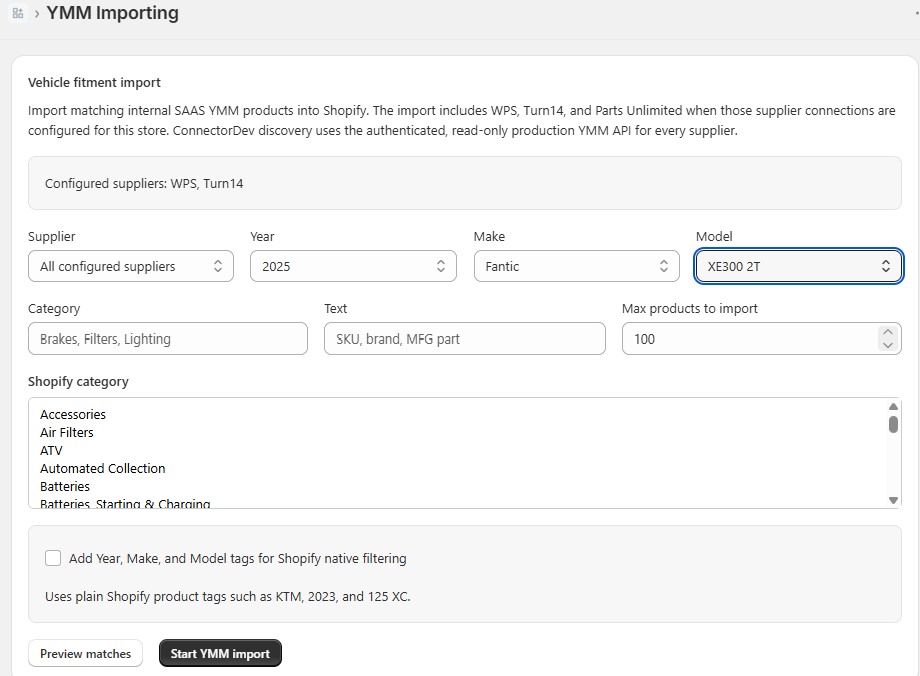
- Vehicle Fitment Import: choose a Year, Make, and Model, then import matching supplier products. Fitment comes from the IndieMoto master fitment database.
Live Storefront Fitment
Shopify storefront fitment is served live instead of being copied into product metafields. This avoids stale vehicle lists and removes fitment payloads from product syncs. The hosted scripts discover the installed shop dynamically; the Custom Liquid does not contain a paid instance ID.
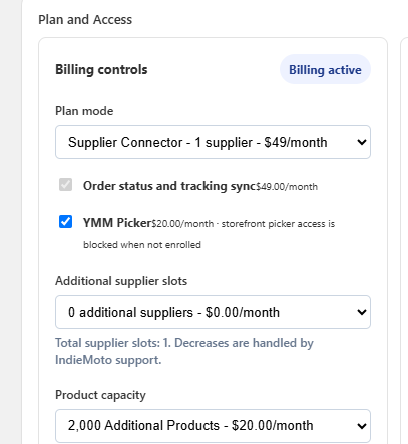
- YMM Picker: a paid $20/month add-on that searches only products available to that store. Access stops immediately if the add-on is disabled.
- Product Fitment: loads current compatible vehicles for a mapped product SKU and displays Powered by iM1 attribution.
Before You Start
- The Shopify app must be installed and connected for the store.
- The app proxy must be configured as /apps/indie-moto-ymm.
- Products must be imported through the Supplier Connector so the YMM database can connect fitment rows to Shopify products.
Step 1: Open the Theme Editor
- Log in to Shopify Admin.
- Go to Online Store → Themes.
- Click Customize on the active theme.
- Open the template where the finder should appear, usually the home page, a collection page, or a custom landing page.
Step 2: Add a Custom Liquid Section
- In the left sidebar, click Add section or Add block.
- Select Custom Liquid.
- Place the block where the complete parts finder should appear.
Step 3: Paste the YMM Finder Code
Paste this code into the Custom Liquid editor. Year, Make, Model, and matching product cards all render inside the same block. No separate results page, shop domain, or paid instance ID is required in the Liquid.
<indie-shopify-ymm-picker mode="collection"></indie-shopify-ymm-picker>
<script src="https://papa-bills.indie-moto.com/widgets/indie-shopify-ymm-picker.js" defer></script>
Step 4: Save and Test
- Click Save in the Shopify theme editor.
- Open the storefront page where the block was added.
- Select a Year, then Make, then Model.
- Confirm matching product cards appear below the picker without leaving the page and link to the correct Shopify products.
- Test text search, recent vehicles, and the availability, brand, and category filters.
How It Works
The finder calls the app proxy at /apps/indie-moto-ymm. The connector verifies the paid installation, searches the global fitment database, filters results to products imported for that Shopify store, and returns product titles, URLs, images, SKUs, and supplier information. The hosted script renders those products below the picker and keeps the selected vehicle in the current page URL. The app resolves the installed shop and paid instance dynamically; no instance ID is embedded in the Custom Liquid.
The hosted finder provides the same storefront workflow as the Wix parts finder: YMM and text search, recent vehicles, breadcrumbs, exact-fit product cards, inventory and sale pricing, product filters, and progressive loading in groups of 25.
API path: /apps/indie-moto-ymm
Access: signed app proxy and active paid installation
Troubleshooting
The Year dropdown is empty
- Confirm the app proxy has been deployed to Shopify.
- Confirm products have been imported through the connector.
- Confirm the store has YMM fitment rows in the database.
Products do not appear after selecting a vehicle
- The selected vehicle may not match any imported Shopify products yet.
- The matching supplier item may exist in the YMM database but not be imported into that Shopify store.
- Re-import or sync the product, then test the same vehicle again.
Product Page Fitment
Product pages load fitment live from the iM1 API. Shopify stores only the supplier SKU and product mapping; fitment is not copied into product metafields and does not require product syncs.
Product Fitment Step 1: Open a Product Template
- Log in to Shopify Admin.
- Go to Online Store → Themes.
- Click Customize on the active theme.
- Open a Product page template.
Product Fitment Step 2: Add a Custom Liquid Block
- In the product template sidebar, click Add block.
- Select Custom Liquid.
- Drag the block near the product description or specifications.
Product Fitment Step 3: Paste the Live Widget Code
Paste this code into the Custom Liquid block. Liquid supplies the product SKU. The hosted iM1 JavaScript resolves the store and paid instance dynamically, then displays current fitment through the signed Shopify app proxy.
{% assign im1_fitment_sku = product.selected_or_first_available_variant.sku %}

<div
  data-im1-live-fitment
  data-sku="{{ im1_fitment_sku | escape }}"
></div>
<script src="https://papa-bills.indie-moto.com/im1-product-fitment.js" defer></script>
Product Fitment Step 4: Save and Test
- Click Save in the Shopify theme editor.
- Open a product imported through the Supplier Connector.
- Confirm the product page shows compatible vehicles below the product information.
How Live Product Fitment Works
The Custom Liquid block loads one hosted JavaScript file. The script calls /apps/indie-moto-ymm with the current variant SKU, renders compatible vehicles in groups of 50, and displays Powered By iM1 attribution.
- Fitment changes are visible without a Shopify product sync.
- Successful responses are cached briefly to protect the API and keep storefront pages fast.
- A paid Supplier Connector installation is required.
Product Fitment Troubleshooting
No fitment appears on the product page
- The product must be imported through the Supplier Connector.
- The selected product variant must have the supplier SKU.
- The Custom Liquid block must be added to the correct product template.
- The theme changes must be saved.
Fitment does not update immediately
Live results can remain cached for up to five minutes. Reload the product page after that window; no supplier product sync is needed.
Wix YMM Picker Add-on
The Wix YMM picker is a hosted Custom Element for Wix Stores. It filters the picker dropdowns to products imported through the WPS Connector for the selected Wix instance, then shows matching product cards that link to the Wix product pages.
Wix Step 1: Enable Billing
- Open the IndieMoto admin area.
- Go to Connector Apps.
- Select the Wix installation.
- Open Billing & Access.
- Copy the displayed Instance ID.
- Enable the YMM picker add-on. The add-on is $20/month.
- Save the selected installation.
Wix Step 2: Add a Custom Element
- Open the Wix Editor for the site.
- Turn on Dev Mode if it is not already on.
- Open the page where the YMM picker should appear.
- Add a Custom Element from the Embed Code / Custom Embeds area.
- Set the custom element tag name to indie-ymm-picker.
Wix Step 3: Choose the Widget Source
With the Custom Element selected, click Choose Source and select Server URL. Paste this script URL:
https://saas.indie-moto.com/widgets/indie-ymm-picker.js?v=19
Wix Step 4: Set Attributes
With the Custom Element selected, click Set Attributes and add these attributes:
- instance-id - paste the Instance ID copied from Connector Apps billing.
- api-base - optional. Use https://saas.indie-moto.com if you need to override the default API host.
Wix Step 5: Publish and Test
- Resize the Custom Element so product cards have room to show.
- Preview the Wix page.
- Select Year, Make, and Model.
- Confirm the picker shows only matching imported Wix products.
- Click View product and confirm it opens the Wix product page.
- Publish the Wix site when the picker works in preview.
Wix Troubleshooting
The picker says the instance ID is missing
Open Set Attributes on the Custom Element and confirm the attribute is named instance-id.
The dropdowns are empty
- Confirm products have been imported through the Wix WPS Connector.
- Confirm the selected Wix installation has WPS products with YMM fitment data.
- Confirm the Custom Element source URL is the hosted widget URL.
Updated widget changes do not appear
Wix may cache Custom Element scripts. Increase the version number at the end of the widget URL, for example changing ?v=19 to the latest version provided by support.